
When it comes to home maintenance, replacing old caulk around sinks, tubs, windows, and doors can make a big difference in the overall look and functionality of your space. Caulk plays a critical role in sealing gaps and preventing moisture from seeping into areas that can cause damage over time. If you’re noticing peeling, cracking, or moldy caulk around the house, it’s time for a fresh application. In this blog post, Specialized Services helps you remove the old caulk and apply new caulk in a way that will ensure long-lasting results.
Why Caulk Needs to Be Replaced
Before diving into the removal and application process, it’s important to understand why caulk needs to be replaced in the first place. Over time, caulk can lose its flexibility, begin to crack, or get discolored due to moisture and environmental factors. In some cases, old caulk may harbor mold or mildew, which can be harmful to your health and look unsightly. Regularly replacing caulk helps prevent water damage, reduces energy costs by sealing air leaks, and enhances the overall appearance of your home.
Caulk plays a crucial role in sealing gaps and preventing moisture, air leaks, and pests from entering your home. Over time, it deteriorates due to exposure to temperature changes, humidity, and general wear, leading to cracks, shrinkage, or peeling. Damaged caulk can cause water damage, mold growth, and energy inefficiency. Regularly replacing caulk ensures a tight seal, maintaining your home’s integrity and aesthetics. Professional caulking services provide expert application, ensuring long-lasting protection and a flawless finish. If your caulk is cracking or peeling, it’s time to call a caulking service to restore your home’s durability and energy efficiency.
Tools and Materials You’ll Need
To get the job done properly, having the right tools and materials is essential. Here’s a list of what you’ll need:
- Caulk remover (optional)
- Utility knife or caulk scraper
- Caulk gun
- New caulk (silicone or latex, depending on your needs)
- Masking tape (optional)
- Rags or paper towels
- Caulk smoothing tool (optional)
- Gloves (optional)
- Vinegar or rubbing alcohol (for cleaning)
Once you have everything in place, you can begin the process of removing the old caulk and applying new caulk.
Step 1: Removing Old Caulk
The first task is to remove the old, damaged caulk from the area. This might seem like a tedious task, but with the right techniques, it can be done quickly and efficiently. Start by using a utility knife or a dedicated caulk scraper to cut into the caulk along the edges. Be careful not to damage the surrounding surfaces, especially if you’re working with delicate materials like tile or wood.
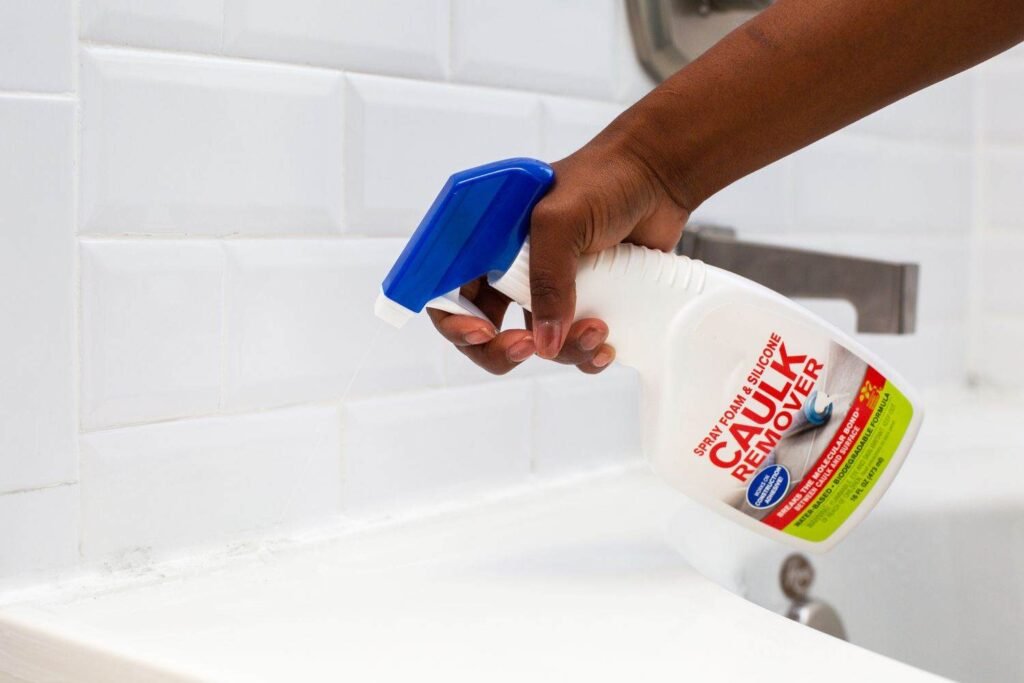
If the caulk is particularly stubborn, you can use a caulk remover product to soften the material and make the removal process easier. Simply apply the caulk remover according to the manufacturer’s instructions, let it sit for a few minutes, and then scrape it off with your knife or scraper.
Once the majority of the caulk is removed, inspect the area for any leftover residue. You might need to use a damp cloth or some vinegar to wipe off the last bits. Make sure the surface is completely clean and dry before proceeding to the next step.
Step 2: Clean and Prepare the Surface
Cleaning the surface is a crucial step before applying new caulk. Any dirt, soap scum, or moisture left on the surface can affect the adhesion of the new caulk. Start by wiping down the area with a damp cloth to remove loose debris. For more stubborn buildup, you can use a mixture of vinegar and water or rubbing alcohol to clean the surface.
Once the area is clean, dry it thoroughly with a dry cloth. If you’re working in a bathroom or kitchen where moisture is common, make sure the area is completely dry before applying the new caulk. This will help the new caulk stick properly and ensure a better seal.
Step 3: Masking the Edges (Optional)
If you want to achieve a neat and professional-looking finish, you can apply masking tape along the edges of the area where the caulk will be applied. This will help create clean lines and prevent the caulk from spreading where it shouldn’t. Be sure to press the tape firmly to avoid any gaps.
If you prefer a more natural application, you can skip this step and apply the caulk directly to the surface.
Step 4: Applying the New Caulk
Now that your surface is prepared, it’s time to apply the new caulk. Start by loading the caulk tube into your caulk gun. Cut the nozzle of the tube at a 45-degree angle with a utility knife, ensuring the opening is just slightly smaller than the gap you are filling. This allows you to control the flow of the caulk and apply it evenly.
Place the tip of the caulk gun at one end of the seam and apply steady pressure to squeeze the caulk into the gap. Move along the seam in a continuous motion, making sure the caulk fills the gap completely. If you encounter any resistance or air pockets, apply a little more pressure to ensure smooth coverage.
For larger gaps, you may need to apply a bit more caulk to fill the space. If the gap is narrow, a smaller bead of caulk will be sufficient.
Step 5: Smoothing the Caulk
Once you’ve applied the caulk, the next step is to smooth it out. You can use your finger, a caulk smoothing tool, or a damp rag to create a clean, even surface. Gently run the smoothing tool along the caulk line, ensuring it fills the gap properly and doesn’t leave any air pockets.
If you’re using your finger, dampen it with water to prevent the caulk from sticking to your skin. Be sure to wipe off any excess caulk as you go, and avoid pressing too hard, as this could cause the caulk to spread unevenly.
If you’ve used masking tape, remove it immediately after smoothing the caulk to avoid pulling the caulk off with the tape. Be careful when removing the tape to maintain a straight, clean edge.
Smoothing the caulk is a crucial step in ensuring a clean, watertight seal around sinks, tubs, and pipes. Proper caulking prevents water leaks, mold growth, and structural damage, making it an essential part of plumbing maintenance. After applying the caulk, use a damp finger or a caulking tool to smooth it out for a professional finish. For homeowners struggling with leaks or deteriorating seals, professional plumbing services can help with expert caulking and repairs, ensuring long-lasting protection against water damage. Need assistance? Contact a trusted plumber today!
Step 6: Letting the Caulk Cure
After you’ve smoothed the caulk, give it time to cure properly. The curing time depends on the type of caulk you’re using, but in general, silicone caulk takes about 24 hours to fully cure, while latex caulk may cure in as little as 2 hours. During this time, avoid using the space or exposing the caulk to water.
Check the manufacturer’s instructions for specific curing times, and be patient to ensure the caulk forms a strong, watertight seal.
Step 7: Final Touches and Cleanup
Once the caulk has cured, you can inspect your work to make sure it looks neat and the seal is intact. If you notice any areas that need touching up, apply a small amount of caulk and smooth it out again.
Clean up any tools and dispose of any leftover caulk. Be sure to store your caulk gun and remaining caulk in a cool, dry place for future use
FAQs
Do I need to remove old caulk before applying new caulk?
Very important. Caulk does not stick well to dirty surfaces such as old caulk. Remove the old, clean the joint, let it dry, then apply new caulk.
How to remove and replace caulk around windows?
To effectively remove worn caulk, you’ll need a series of tools. Essential tools include a putty knife, welding torch or heat gun to soften the caulk, long-nose pliers to remove residue, a soft plastic or metal scraper to prevent damage to the window surface, and an applicator gun to apply the new caulk.
How do you seal caulk for reuse?
If you cut a large hole in the caulk cartridge nozzle, our go to method is to seal the hole using a large nail. Drop the nail in the nozzle. Then wrap the nozzle with masking or electrical tape. This will prevent moisture from entering the tube and drying out your caul
Is silicone caulk removable?
There’s no need to use any chemicals when removing old silicone caulk. A little elbow grease and the appropriate tools will suffice. You don’t even need caustic chemicals to clean up the work surface before installing new caulk. A light scrubbing pad should be abrasive enough for your purposes.
Can you remove caulk without caulk remover?
Heat gun or hair dryer: Applying heat to old sealant can help soften it and make it easier to remove. You can use a heat gun or hair dryer to gently warm up the caulk, making it more pliable.
Conclusion
Replacing old caulk may seem like a small home improvement task, but it can have a significant impact on the overall appearance and functionality of your space. By following these steps, you can remove old caulk and apply new caulk that not only looks great but also provides a solid, water-resistant seal for years to come. Whether you’re working on a bathroom, kitchen, or any other part of the house, this simple maintenance task will help keep your home in top shape.