
Installing new windows at home can be exciting and a bit daunting if you’ve never done it before. Whether you’re planning a new window install, considering a complete window replacement, or just curious about how the process works, this guide breaks it down in a friendly, easy‑to‑follow way. From picking the right products to understanding what to expect during installation, we’ll walk you through every step. When done right, residential window installation doesn’t just boost curb appeal; it can increase comfort, lower energy bills with energy-efficient windows, and make your space feel brand new.
In this step‑by‑step walkthrough, you’ll see the tools, preparation, and process pros use when installing vinyl windows or any other style. You’ll learn why hiring experienced window installers matters and how to plan for your project confidently. By the end, you’ll feel informed, prepared, and ready to take the next step, whether that’s DIY or connecting with professionals. Let’s jump in and make sure your windows are done right!
Why Installing Brand New Windows Is Worth It
Installing brand-new windows isn’t just about aesthetics, though that’s a big part of it! When done well, new window installation delivers significant benefits for your home comfort and long‑term value. Choosing the right replacement windows can dramatically improve insulation, reduce noise, and help your HVAC system work less.
Many homeowners don’t realize just how much impact quality window installation can have on energy bills. By upgrading to energy-efficient windows, you’re sealing out drafts and keeping conditioned air inside. That means lower heating and cooling costs, especially in extreme weather. Plus, newer windows often come with enhanced security features and easy‑clean designs that improve everyday life.
Before you start knocking out old frames, understanding the actual value of sound installation helps you prioritize quality over shortcuts. When installed correctly, your new windows can last for decades and significantly increase your home’s resale appeal.
Planning Your Window Project Like a Pro
Before you open any boxes, planning matters. Start by measuring your existing windows carefully. Accurate measurements ensure your new window installation goes smoothly and helps you avoid ordering the wrong size. A slight mistake can turn into a big hassle. Trust us, you don’t want to redo this step!
Next, decide what type of windows you want. Do you like classic double‑hung windows, sliders, casements, or maybe vinyl windows installation that requires less maintenance? Consider climate, style, and budget. You can find lots of ideas online or by browsing showrooms.
As you plan, also think about how each window will affect light and ventilation. If you’re unsure, saving a bit on your quote from window installers to get their input is worth it, especially for larger replacement projects. Don’t rush; thoughtful planning sets the stage for a successful installation.
Tools and Materials You’ll Need
Once you’ve got a clear plan, the next step is prepping your tools and materials. Even if you’re working with professionals, understanding what’s needed helps you follow along and ask thoughtful questions.
Here’s a quick checklist of what you’ll typically need for a residential window installation:
- Tape measure and level
- Pry bar and utility knife
- Screwdrivers or a drill
- Shims and insulation
- Caulking gun and weatherproof sealant
- Flashing and new trim
For projects involving vinyl window installation, you’ll want to make sure you have proper safety gear and follow the manufacturer’s instructions closely. Professionals might use additional specialized tools, but these basics will get you started. Gather everything before you begin so you aren’t scrambling mid‑project!
How to Remove the Old Window Safely
Removing the old window can be one of the more intimidating parts of the process, but if you take your time and follow these steps, it becomes manageable. First, remove any interior trim carefully with a pry bar. Be gentle, you can reuse the trim later.
Next, cut through the old caulking and seal with a utility knife. After that, remove the sash (the part that holds the glass) and then the frame. You may need help lifting larger windows; they can be heavy and awkward!
Make sure you clean the opening thoroughly once the old window is out. Remove old insulation, nails, and debris so your new window sits flush and squared. A clean working space ensures your window installation goes in straight and sealed tight, a key step for energy-efficient windows.
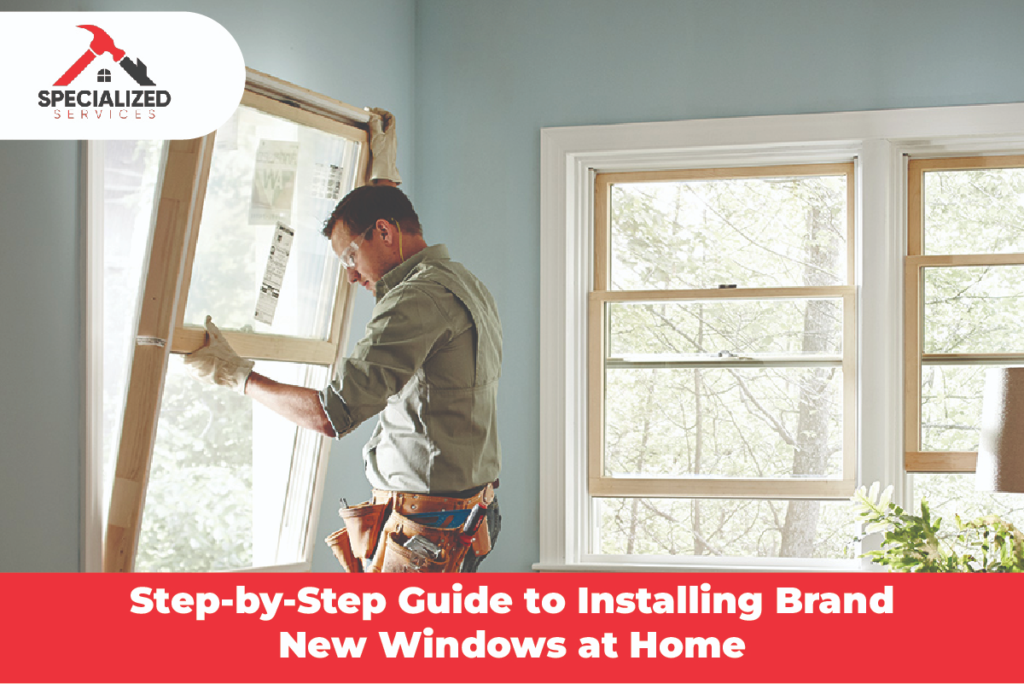
Installing Your New Window Step‑by‑Step
Now, the exciting part: putting in your brand-new windows! Once the opening is prepped and cleaned, check the fit by dry‑placing the window into the opening. Use your level to ensure it’s straight and square.
Apply a bead of weatherproof sealant to the exterior and interior edges, then slide the window pane into place. Secure with screws through the side jambs as recommended by the manufacturer. Check your level frequently as you work; an unlevel window can cause operational or sealing issues.
After fastening, use insulation to fill any gaps around the frame. Spray foam insulation works well, but be cautious; too much can warp the frame. Finally, apply exterior flashing and seal with caulk. This final barrier keeps water out and improves long‑term performance.
If this all sounds like a lot, that’s because it can be. That’s precisely why many homeowners choose trusted window installers who bring experience and efficiency to every job. If you’re unsure or working with large or custom windows, professional help from services can make everything easier.
Final Adjustments, Inspection & Clean‑Up
With your windows installed, don’t skip the finishing touches. Open and close every window to confirm smooth operation. Check seals inside and out for any gaps, and touch up caulking if needed. You want to ensure everything performs as expected before the installation “officially” ends.
Clean up leftover materials, tools, and debris. A good cleanup makes your new windows shine and helps you see the final result clearly. Take some time to enjoy the refreshed look and improved comfort; you earned it!
If you’re working with professional installers, most will handle finishing touches and clean‑up for you. Excellent service will leave you confident and happy with your new window installation.
When to Call the Professionals
There’s no shame in calling in the experts. Whether your project is complex, requires structural changes, or you simply prefer a stress‑free experience, professional residential window installation teams are worth it. They bring the right tools, experience with safety codes, and the know‑how to avoid common mistakes.
Working with vetted professionals also makes warranty claims easier and ensures long‑term performance for your energy-efficient windows or specialty options. For example, reading more about how experts can add value to your home through proper window services can be eye‑opening.
DIY is fantastic for many projects, but windows are one area where pros truly shine.
Final Thoughts: Enjoy Your Updated Home!
Installing brand new windows at home doesn’t have to be a headache. With the proper planning, tools, and mindset, it’s a rewarding upgrade that boosts comfort, efficiency, and style. Whether you take this on yourself or team up with reliable window installers, you now have a clear roadmap to success.
Remember, quality installation matters just as much as quality windows. From window replacement to complete new window installation, your home deserves the best. If you ever feel unsure, don’t hesitate to reach out for expert help; your peace of mind is worth it!
Frequently Asked Questions
Q1: How long does a typical window installation take?
Most standard residential window installations take one to three hours per window, depending on complexity and size.
Q2: Can I install windows myself, or do I need professionals?
Simple installations can be DIY, but complex jobs or homes with custom sizes benefit from professional expertise.
Q3: Will new windows really reduce my energy bills?
Yes! Especially if you install energy-efficient windows, you’ll notice better insulation and lower heating/cooling costs.
Q4: What types of windows are most straightforward to install?
Vinyl windows are often the easiest for DIY because they’re lightweight and forgiving during installation.
Q5: Do I need to prepare my home before installers arrive?
Yes! Clear furniture, remove window treatments, and make space around work areas to help installers work efficiently.